Is your PS4 keep disconnecting from WiFi or the internet? Well, it’s one of the common issues that was claimed by PlayStation 4 users. According to the PS4 owners, sometimes it becomes hard to find out what is causing the issue with the internet on the PlayStation.
In this short guide, we are going to explain to you how you can easily fix this WiFi issue on PS4 by applying these given troubleshooting tips.
Reason Behind PS4 Keeps Disconnecting From WiFi
The reason behind the PS4 WiFi connection issue is mainly due to the Software and you can easily fix this without taking help from an expert.
Reasons:
- Software Error
- Incorrect Placement of the WiFi Router
- WiFi Signal Issues
- Technical Bug In Your PS4
- Relevant Point
However, in most rare cases, the issue can be caused by router placement and the signal interference caused by the other devices.
All you need to do is simply follow the troubleshooting guide mentioned in this short guide.

Troubleshooting To Fix PS4 WiFi Connection Issue?
Mostly the issue is caused by the Wireless Frequency bands and this short guide is going to cover this topic along with methods that can be applied to fix the issue without having a hassle.
We also explain what causes the frequency bands issue with PlayStation 4 and how you can fix it, There are multiple troubleshoots in this article that you can apply in case if one does not work for you.
Manually Setup the WiFi Frequency Band
The old model of PlayStation 4 supports the 2.4 GHz frequency band and on the other hand, the PS4 Pro supports both 2.4 GHz and 5 GHz band frequencies.
Mostly the WiFi issue is faced by the PlayStation 4 Pro version because this gaming console has an automatic selection of frequency bands for better internet speed. PS4 Pro will keep switching from 2.4 GHz to 5 GHz or sometimes it will lose the connection, your game will start lagging, or sometimes speeds up.
In case you own a dual-brand Wireless Router then you must select the bands manually from the gaming console such as PS4.
Moreover, the 2.4 GHz band offers better coverage but slower internet speed and on other hand, the 5 GHz offers less coverage but faster internet speed. To know which frequency band is best for you try to use them one by one on your gaming console.
Follow the steps to switch from frequency bands in PlayStation 4.
- Go to Settings from the menu. Then choose Network > Setup Internet Connection and then select the Use WiFi option in Easy mode.
- After this navigate to the Options Menu given at the bottom of the screen.
- Now, simply open the Wi-Fi frequency bands and then select 2.4 GHz or 5 GHz.
After following all three steps you can easily switch between frequency bands from your PlayStation 4. Once you know which brand works better with your PS4 console then keep that frequency band.
Close The Application and Re-Open It
It totally sounds weird but most of the time, simply closing and reopening the app will fix the issue. This is because when you close the application all the processing running in it will be closed and when you relaunch the application it will start from the begging and this process will remove all the temporary bugs and cause the issue in the WiFI connection.
For instance, if you’re playing Call of Duty and experience and WiFi issue. Then simply go to the Home screen of the game and close it. Make sure to save your game data and then close the game. After this shutdown, the gaming closed and wait for a few minutes. Now, restart the console and game once again.
If the WiFi issue does not seem to be a problem then enjoy your game. In case this troubleshooting also does not work for you. Then simply apply the next troubleshooting.
Reset The Gaming Console
Most players said the WiFi issue is fixed by simply resetting their gaming console. You can easily reset your PlayStation 4 for a few minutes by following the below-given step-by-step instructions carefully.
Note: Resetting the PlayStation 4 will remove all the data including the games to avoid data loss. Make sure you generate a backup of your games on a cloud storage or external device.
In case you don’t want to delete all the Save data from your PS4 then instead of the “Initialize PS4” option select the “Restart PS4”. This will simply restart your PlayStation. If you’re playing any game on your gaming console. Make sure to save the game to avoid playing the same level again and again.
- If you’re playing any game on your PS4 then exist the game after saving it.
- Now, Turn off your PlayStation 4 by the power button.
- Simply, Unplug the Power Cable from the back of the console and (wait for 5 minutes).
- After this, Plug the Power Cable back into the console.
- Press the Power button for 10 seconds and wait for the 2nd beep.
- You need to connect your Dualshock 4 controller to the PS4 using the USB Cable.
- In the end, choose “Initialize PS4″ with the help of the “X” button from the Controller.

Restart The Wireless Router
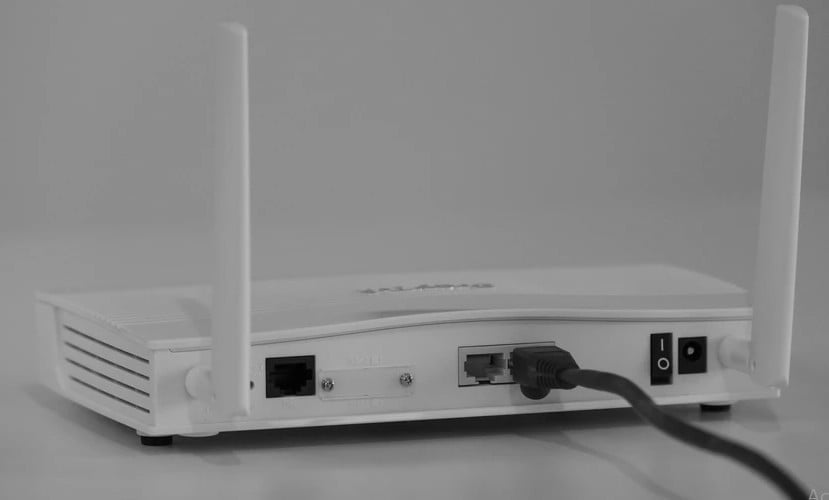
Rebooting the wireless router can also fix the PS4 WiFi issue. For this, you need to unplug the Power cable of the router and plug it in again in 10 seconds.
Now wait till the router restart and power up and try to establish the network connection with your PlayStation 4. Hopefully, if the router is causing the issue then after rebooting it the issue will be completely gone.
Unfortunately, if the rebooting won’t help then you need to contact your ISP (Internet Service Provider) and explain the connection drop, or else you can also test the speed of your network connection through the PS4 Test Internet Connection option.
You can also try to reset the Router using the physical button given at the back of the router. All you need to reset the router is simply to press the Reset button for almost 10 seconds. After the beep, the router will reset and try to establish the connection with your PS4.
Delete And Re-Install the Game
There are certain games that face connection drop issues games including Call of Duty Modern Warfare. In case if this is the issue you can easily fix it by simply uninstalling and reinstalling the game again into your PlayStation 4 gaming console.
Follow the below-given step-by-step instructions to delete the game on PS4.
- Firstly, Go to the game in the Menu and simply highlight the desired game.
- Now, after this press the Options button from the PS4 Controller.
- After this select the Delete option from the Menu
- Hit the confirmation button to delete the game from your PS4.
After uninstalling the game, you need to reinstall the game on a physical disc or PlayStation Store.
Switch DNS Settings on PlayStation 4
By simply switching the DNS (Domain Server Name) can also resolve the PS4 connection drop issue. More importantly, it can also increase internet speed. On the web, there are several high-performance DNS available for paid and free. But we can suggest you use Cloudfare or Google DNS both are good for gaming.
In case if you’re not a greek guy and don’t how to change DNS on your PlayStation 4 then don’t. Here we have provided step-by-step instructions that you can follow in order to switch the DNS settings.
- Firstly Go to the PlayStation 4 Settings > Network > Setup Internet Connection.
- After that simply, select WiFi > Custom > Automatic for IP Change Settings.
- Do Not Specify for DHCP Hostname. After this select Manual given under DNS Settings.
- Type (8.8.8.8) as Primary and (8.8.4.4) as Secondary DNS.
- Now select Automatic for MTU Settings.
- In the last select “Do not use under Proxy Server” and hit Test your internet connection.
Change the Location of the PlayStation 4
Most of the time the connection drop issue can also be caused by signal interference as we guide you at the beginning of this short guide in the reasons section. To fix this you need to remove all the unwanted devices around your wireless router or modem.
More importantly, try to keep your PlayStation 4 console near the router location or elsewhere the WiFi signals are best at your home you can also place the wireless router near your PS4.
Setup Static IP Address For PlayStation 4
If you configure your IP Address Settings on automatic then you can also face an internet connection drop. To fix you can use the Dynamic IP Address, However, the dynamic IP Address can only be changed when your ISP decides to provide you with a new IP address or else when you reset your Router.
Fountently, the Static IP Address does not change when you reboot your router. That is why the Static IPs were stable to use when you want a stable connection. You must know that this method will change your Local IP and not your Public IP address.
Follow the step-by-step instructions to change the Static IP Address on PlayStation 4.
- Go to Settings on your PS4 then open Network > View Connection Status.
- You need to note down or capture a picture of the IP address, Subnet Mask, and Default Gateway and go back to the menu.
- After that, select Setup Internet Connection and then select Use WiFi.
- Choose Custom > Manual.
- Enter the first three numbers (three sectors) of your IP address and any number between 2 and 255 as your final number (section)
- Now enter the default gateway and Subnet Mask that you’ve to note down in the second step.
- After that, Choose Automatic of MTU Settings > Do Not Use for Proxy Server.
- In last, Test your Internet Connection and Try using WiFi Now.
Video Guide To Switch IP Address on PS4
By changing the Static IP on PS4 you can get a faster speed internet connection and the connection drop issue can easily be resolved.
Rebuilding Your PS4 Database
Rebuilding the PS4 database is a well-known method for resolving software issues. It may take 15 minutes to an hour to complete the process, but in most circumstances, if alternative options aren’t working for you, it’s worth a go.
In case if you don’t know how to rebuild the PS4 database. Then don’t worry at all here in this guide we also have a step by step instructions that you can easily follow in order to rebuild your database without having a hassle.
- If you’re playing any Game then make sure to save it To avoid playing the level again.
- Now, Turn off your PlayStation 4.
- After that, simply Press and Hold the Power button for 10 seconds.
- You’ll need to connect your DualShock 4 controller to the PlayStation 4 via a USB cable.
- Press the PlayStation button on the controller.
- After that, scroll down and choose the ”Rebuild Database” via the “X” button on the controller.
- You need to wait for some time and when the process is done then reboot your PS4.
- Sign in to PlayStation Network, connect to Wi-Fi, and see if the connection problem persists while gaming.
Note To Consider: Well once you rebuild your PlayStation 4 database. In case if any of the games were missions from your PS4. Then don’t worry or try to install it again, Simply follow these steps to restore the mission game. Go to Settings > Account Management > Restore License > Restore.
Connect PS4 using Ethernet Cable
If all the above troubleshooting methods do not work for you then the last option left is to connect your PlayStation 4 using the Ethernet Cable.
Well as we all know, an ethernet cable connection offers a stable and reliable internet network connection and if you’re lucky ou can get 100x speed compared to a WiFi connection.
If you don’t know how you can connect your PS4 with Ethernet Cable. Don’t worry follow the below given steps in order to connect your PS4 using the ethernet cable.
- Connect the Ethernet Cable to the Ethernet Port on both devices. First point of either cable to PS4 and the second point of the cable to the Router.
- After that, Turn on both the device your PS4 and your Router.
- Now, Go to Settings > Network > Set Up Internet Connection > Use LAN Cable > Easy.
- Enjoy high-end internet speed on your PS4.
This is the end of this short guide, hopefully, you find this short guide helpful to understand the troubleshoot that you can apply whenever your PlayStation 4 come across the WifI connection drop issue.
If you have any other suggestion that we can include in this short guide that helps our readers get rid of the WiFi issues on PS4 then feel free to share it using the comment box.
Related Articles

