Gunsmith Part 13: If you’re an experienced player of Escape from Tarkov, you’ve probably already completed Gunsmith Part 12 and are now looking to tackle the next quest in the series, Gunsmith Part 13.
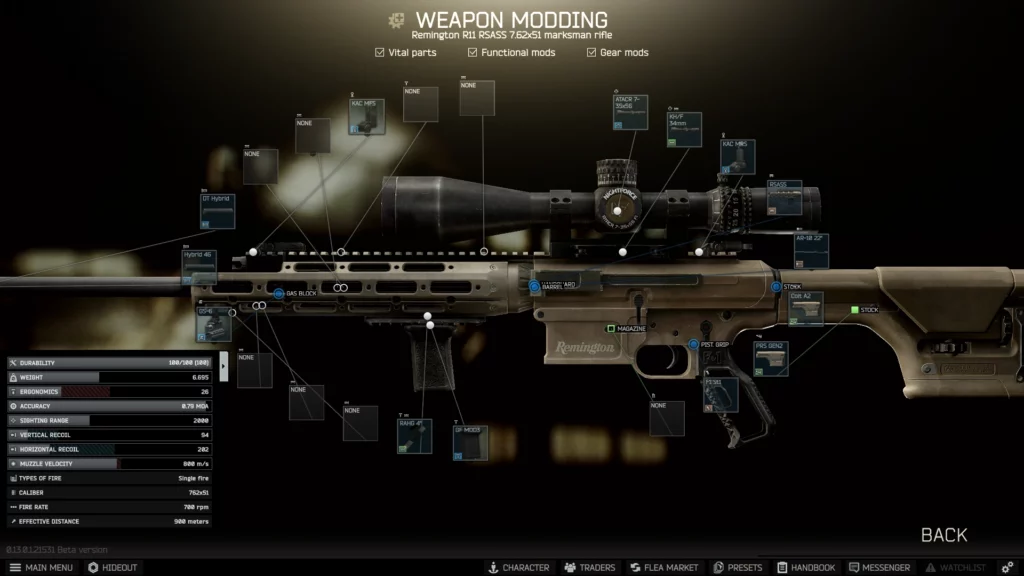
This task requires you to modify an R11 RSASS to comply with the given specifications. In this guide, we’ll show you how to do it and provide you with some examples of possible configurations.
Requirements
Before you can start this quest, you must be at least level 25.
Objectives
Your objective is to modify an R11 RSASS to meet the following specifications:
- Durability: 60 or higher
- Ergonomics: 26 or higher
- Recoil: 300 or lower
- Sighting range: 1,500 or higher
- Weight: 6.7 kg or less
- Silencer
Rewards
Completing this quest will reward you with +13,600 EXP and increase your Mechanic reputation by 0.02. You’ll also receive 500 dollars, two corrugated hoses, and two packs of nails. Additionally, this quest will unlock the purchase of the KAC PRS/QDC 7.62×51 sound suppressor at Peacekeeper.
Guide

There are two possible configurations for the RSASS build in Gunsmith Part 13. In this guide, we’ll be covering both configurations and the shopping list required to build them.
Build 1 – RSASS Configuration
This build features a more traditional RSASS configuration with a few modifications to meet the quest’s specifications.
- Remove the magazine.
- Attach the SilencerCo Hybrid 46 Direct Thread Mount adapter to the RSASS receiver. (Purchased from Peacekeeper at LL2)
- Attach the SilencerCo Hybrid 46 multi-caliber sound suppressor to the adapter. (Purchased from Peacekeeper at LL2 or through barter from Mechanic at LL2)
- Attach the Remington RAHG 4 inch rail to the RSASS receiver. (Purchased from Mechanic at LL2)
- Attach the BCM GUNFIGHTER MOD 3 vertical foregrip to the Remington RAHG 4 inch rail. (Purchased from Mechanic at LL2)
- Attach the EOTech Vudu 1-6×24 30mm riflescope to the Lobaev Arms 30mm scope mount. (Purchased from Skier at LL3 or through barter from Jaeger at LL1)
Build 2 – Alternate RSASS Configuration
This build is a bit different than the traditional RSASS configuration, but it still meets the quest’s specifications.
- Remove the magazine.
- Attach the SilencerCo Hybrid 46 Direct Thread Mount adapter to the RSASS receiver. (Purchased from Peacekeeper at LL2)
- Attach the SilencerCo Hybrid 46 multi-caliber sound suppressor to the adapter. (Purchased from Mechanic at LL2 or through barter from Peacekeeper at LL2)
- Attach the Remington RAHG 4 inch rail to the RSASS receiver. (Purchased from Mechanic at LL2)
- Attach the BCM GUNFIGHTER MOD 3 vertical foregrip to the Remington RAHG 4 inch rail. (Purchased from Mechanic at LL2)
- Attach the EOTech Vudu 1-6×24 30mm riflescope to the Lobaev Arms 30mm scope mount. (Purchased from Skier at LL3 or through barter from Jaeger at LL1)
Conclusion
Gunsmith – Part 13 are challenging quests in Escape from Tarkov that require careful planning and attention to detail.
These quests involve finding and modifying specific weapons to meet certain specifications, which can be achieved through purchasing or bartering the necessary attachments from specific vendors.
Gunsmith Part 1 / Gunsmith Part 2 / Gunsmith Part 3 / Gunsmith Part 4 / Gunsmith Part 5 / Gunsmith Part 6 / Gunsmith Part 7 / Gunsmith Part 8 / Gunsmith Part 9 / Gunsmith Part 10 / Gunsmith Part 11 / Gunsmith Part 12

